Let’s Talk Project Management
If you’re juggling multiple projects, tight deadlines, and cross-functional teams, you know that staying organised is half the battle. Enter Microsoft Project—a powerful tool designed to help professionals like you plan, execute, and monitor projects with precision.
This guide is tailored for efficient professionals seeking to harness Microsoft Project’s capabilities to streamline workflows and enhance productivity.
Why Choose Microsoft Project?
Microsoft Project offers:
- Robust Planning Tools: Create detailed project plans with tasks, durations, and dependencies.
- Resource Management: Allocate resources effectively to avoid overallocation.
- Progress Tracking: Monitor project timelines and budgets in real-time.
- Integration: Seamlessly integrates with other Microsoft 365 applications.
Getting Started: Understanding the Interface
Upon launching Microsoft Project, you’ll encounter:
- Gantt Chart View: Visual representation of your project schedule.
- Task List: Outline of all project tasks and their details.
- Timeline: High-level view of project milestones.
Step 1: Setting Up Your Project
- Create a New Project: Go to File > New and select a blank project.
- Set Project Information: Navigate to Project > Project Information to define start dates and other parameters.
- Define Working Times: Use Project > Change Working Time to set working hours and holidays.
Step 2: Adding Tasks and Milestones
- Enter Tasks: Input task names in the ‘Task Name’ column.
- Set Durations: Specify how long each task will take.
- Define Milestones: Assign zero duration to tasks to mark them as milestones.
Step 3: Establishing Task Dependencies
Link tasks to reflect their relationships:
- Finish-to-Start (FS): Task B starts after Task A finishes.
- Start-to-Start (SS): Tasks A and B start simultaneously.
- Finish-to-Finish (FF): Tasks A and B finish at the same time.
- Start-to-Finish (SF): Task B finishes after Task A starts.
Step 4: Allocating Resources
- Create Resource List: Go to View > Resource Sheet and enter resource names, types, and availability.
- Assign Resources: In the Gantt Chart view, assign resources to tasks via the ‘Resource Names’ column.
Step 5: Setting Baselines
Before project execution:
- Set a Baseline: Navigate to Project > Set Baseline to capture the original project plan.
- Compare Progress: Use the baseline to measure actual progress against the plan.
Step 6: Tracking Progress
Update task statuses:
- % Complete: Indicate the completion percentage of tasks.
- Actual Start/Finish Dates: Record when tasks actually started and finished.
Step 7: Generating Reports
Access built-in reports:
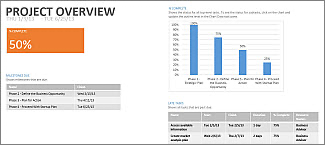
- Project Overview: Summarises project status.
- Resource Overview: Details resource allocation and workloads.
- Cost Overview: Breaks down project costs.
Navigate to Report > Dashboards to select and customise reports.
Tips for Efficient Use
- Use Templates: Save time by starting with pre-built templates.
- Customise Views: Tailor views to display relevant information.
- Leverage Shortcuts: Familiarise yourself with keyboard shortcuts to speed up navigation.
Final Thoughts
Microsoft Project is a comprehensive tool that, when used effectively, can significantly enhance project management efficiency. By understanding its features and applying best practices, you can ensure your projects are well-planned, executed, and delivered on time.